· Alexander · Homelab · 13 min read
Homelab Notifications with ntfy
I've decided to migrate away from Discord for notifications by using a self hosted NTFY.sh instance
So in my previous blog update post I mentioned a few projects I was working on for posts on this blog. Well considering this post wasn’t on the list it’s time to toss the plan! Or did I really have a plan to begin with? 😶

Currently, I have a few homelab notifications being sent to a “private” Discord server. Evident by Logging Fail2Ban to Discord, SSH Login Logging to Discord via Webhooks, GitHub Actions - Automating your Docker Builds with Diun, a few others I was working on, etc. Now, I was going to keep going this route as it does make it extremely convenient since I already have the Discord app on most of my devices. However, I was talking to a good friend of mine, and he brought up a good point.
“My private server isn’t exactly ‘private’ when it comes to someone else managing the data and, the only way to send a notification to Discord is by Webhook or a custom bot. Also, sometimes push notifications to mobile are SUPER delayed.”
So I decided to look into alternatives which lead me to ntfy.sh. The best part? You can self-host it!
What is ntfy.sh?
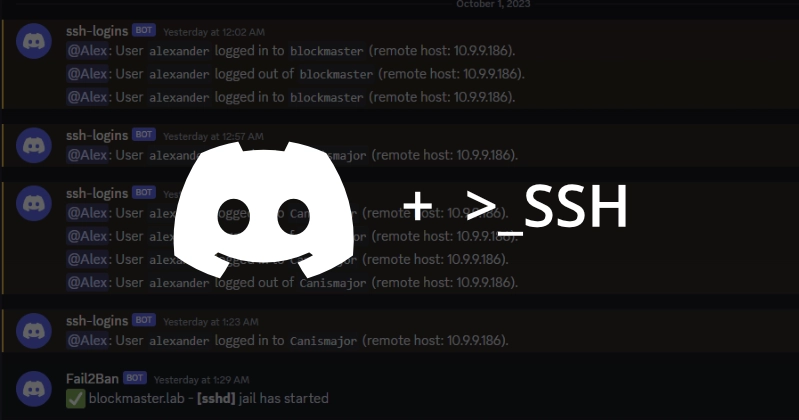
 Examples of some notifications I am piping into my ntfy instance. Picture is the mobile app view
ntfy (pronounced notify) is an HTTP publish / subscribe notification service that allows you to send notifications to your phone or PC. This can be done simply using scripts that can hit ntfy’s REST API or with apps that have direct integrations. The best part about ntfy, (other than being FOSS and having lots of documentation), is that you can self-host it! Which means you can control the data rather than relying on an outside service! Especially if you are rocking an Android phone since you can do instant delivery without Google FBC!
Follow along notes
Before I dive in. There are a few things you will need setup before you can follow along with this post.
- A domain with an A record forwarding to your public IP
- Example domain:
notify.yourdomain.com
- Example domain:
- A web server that is port forwarded to listen on 80/443
- A host to run ntfy on
- I will be using a host that is running Docker, on Ubuntu, as it makes it easy to spin up resources without bloating the host with tons of dependencies.
Setting up the Host
To get started, SSH to your host and install Docker. If you already have docker set up and ready you can skip this section. Run the following commands to install Docker’s dependencies and prepare the host to install Docker.
# Add Docker's official GPG key:sudo apt-get updatesudo apt-get install ca-certificates curlsudo install -m 0755 -d /etc/apt/keyringssudo curl -fsSL https://download.docker.com/linux/ubuntu/gpg -o /etc/apt/keyrings/docker.ascsudo chmod a+r /etc/apt/keyrings/docker.asc
# Add the repository to Apt sources:echo \  "deb [arch=$(dpkg --print-architecture) signed-by=/etc/apt/keyrings/docker.asc] https://download.docker.com/linux/ubuntu \  $(. /etc/os-release && echo "${UBUNTU_CODENAME:-$VERSION_CODENAME}") stable" | \  sudo tee /etc/apt/sources.list.d/docker.list > /dev/nullsudo apt-get update
Finally install Docker.
sudo apt-get install docker-ce docker-ce-cli containerd.io docker-buildx-plugin docker-compose-pluginIf you do not want to run sudo in front of every docker command, you can add your user to the docker group.
sudo chmod -aG docker usernameSetting up ntfy’s Configuration
With Docker now setup we can pivot to getting ntfy up and running. Create the directories to house the docker-compose.yml, cache, user.db, and the server.yml config file.
sudo mkdir -p /opt/docker/ntfysudo mkdir /opt/docker/ntfy/cachesudo mkdir /opt/docker/ntfy/configsudo chown -R $USER:$USER /opt/dockerNext create the docker-compose.yml file and edit it.
cd /opt/docker/ntfynano docker-compose.ymlversion: "3"services: server: restart: always logging: driver: "json-file" options: max-size: "500k" max-file: "1" image: binwiederhier/ntfy command: serve environment: - TZ=America/New_York user: ${UID}:$(id -g) volumes: - /opt/docker/ntfy/cache:/var/cache/ntfy - /opt/docker/ntfy/config:/etc/ntfy ports: - 80:80Hit CTRL+ X then Y to save your changes and close nano. Now do the same but for a file called server.yml.
cd config/nano server.ymldefault-host: "https://notify.yourdomain.com"base-url: "https://notify.yourdomain.com"listen-http: ":80"cache-file: "/var/cache/ntfy/cache.db"behind-proxy: trueattachment-cache-dir: "/var/cache/ntfy/attachments"keepalive-interval: "45s"auth-file: "/etc/ntfy/user.db"auth-default-access: "deny-all"Save and close the file. Now we need to create a user in ntfy. First start the container.
cd ..docker compose up -dConfiguring the Web Server
For my environment I use Caddy as my web server / reverse proxy. So this section will be covering how to configure Caddy to serve ntfy with an SSL certificate. If you don’t have Caddy configured already, check out my quick start guide for Caddy with Cloudflare/cloudflared. Otherwise, you can check out the ntfy docs for other web servers / skip this section.
To serve ntfy we need to tell Caddy where to point our notify domain to. To do this edit the Caddyfile and add the following block section.
notify.yourdomain.com, http://notify.yourdomain.com { import tls log { output file /config/logs/notify.log { roll_size 10mb roll_keep 5 roll_keep_for 24h } } reverse_proxy ntfy-server-1 @httpget { protocol http method GET path_regexp ^/([-_a-z0-9]{0,64}$|docs/|static/) } redir @httpget https://{host}{uri}}You will need to change notify.yourdomain.com, http://notify.yourdomain.com to your domain. You will also need to replace ntfy-server-1 to match your container environment or service IP/port. Once added, save and close the file and reload Caddy. If all goes well you can hit your domain, and you will see the web interface for ntfy. It will look like the image below minus the pro upgrade.
Since I have a dedicated docker network I attach containers to for Caddy, I am able to do DNS lookups internally on the container names. This also means I am not exposing service ports to the host so port conflicts are minimized.
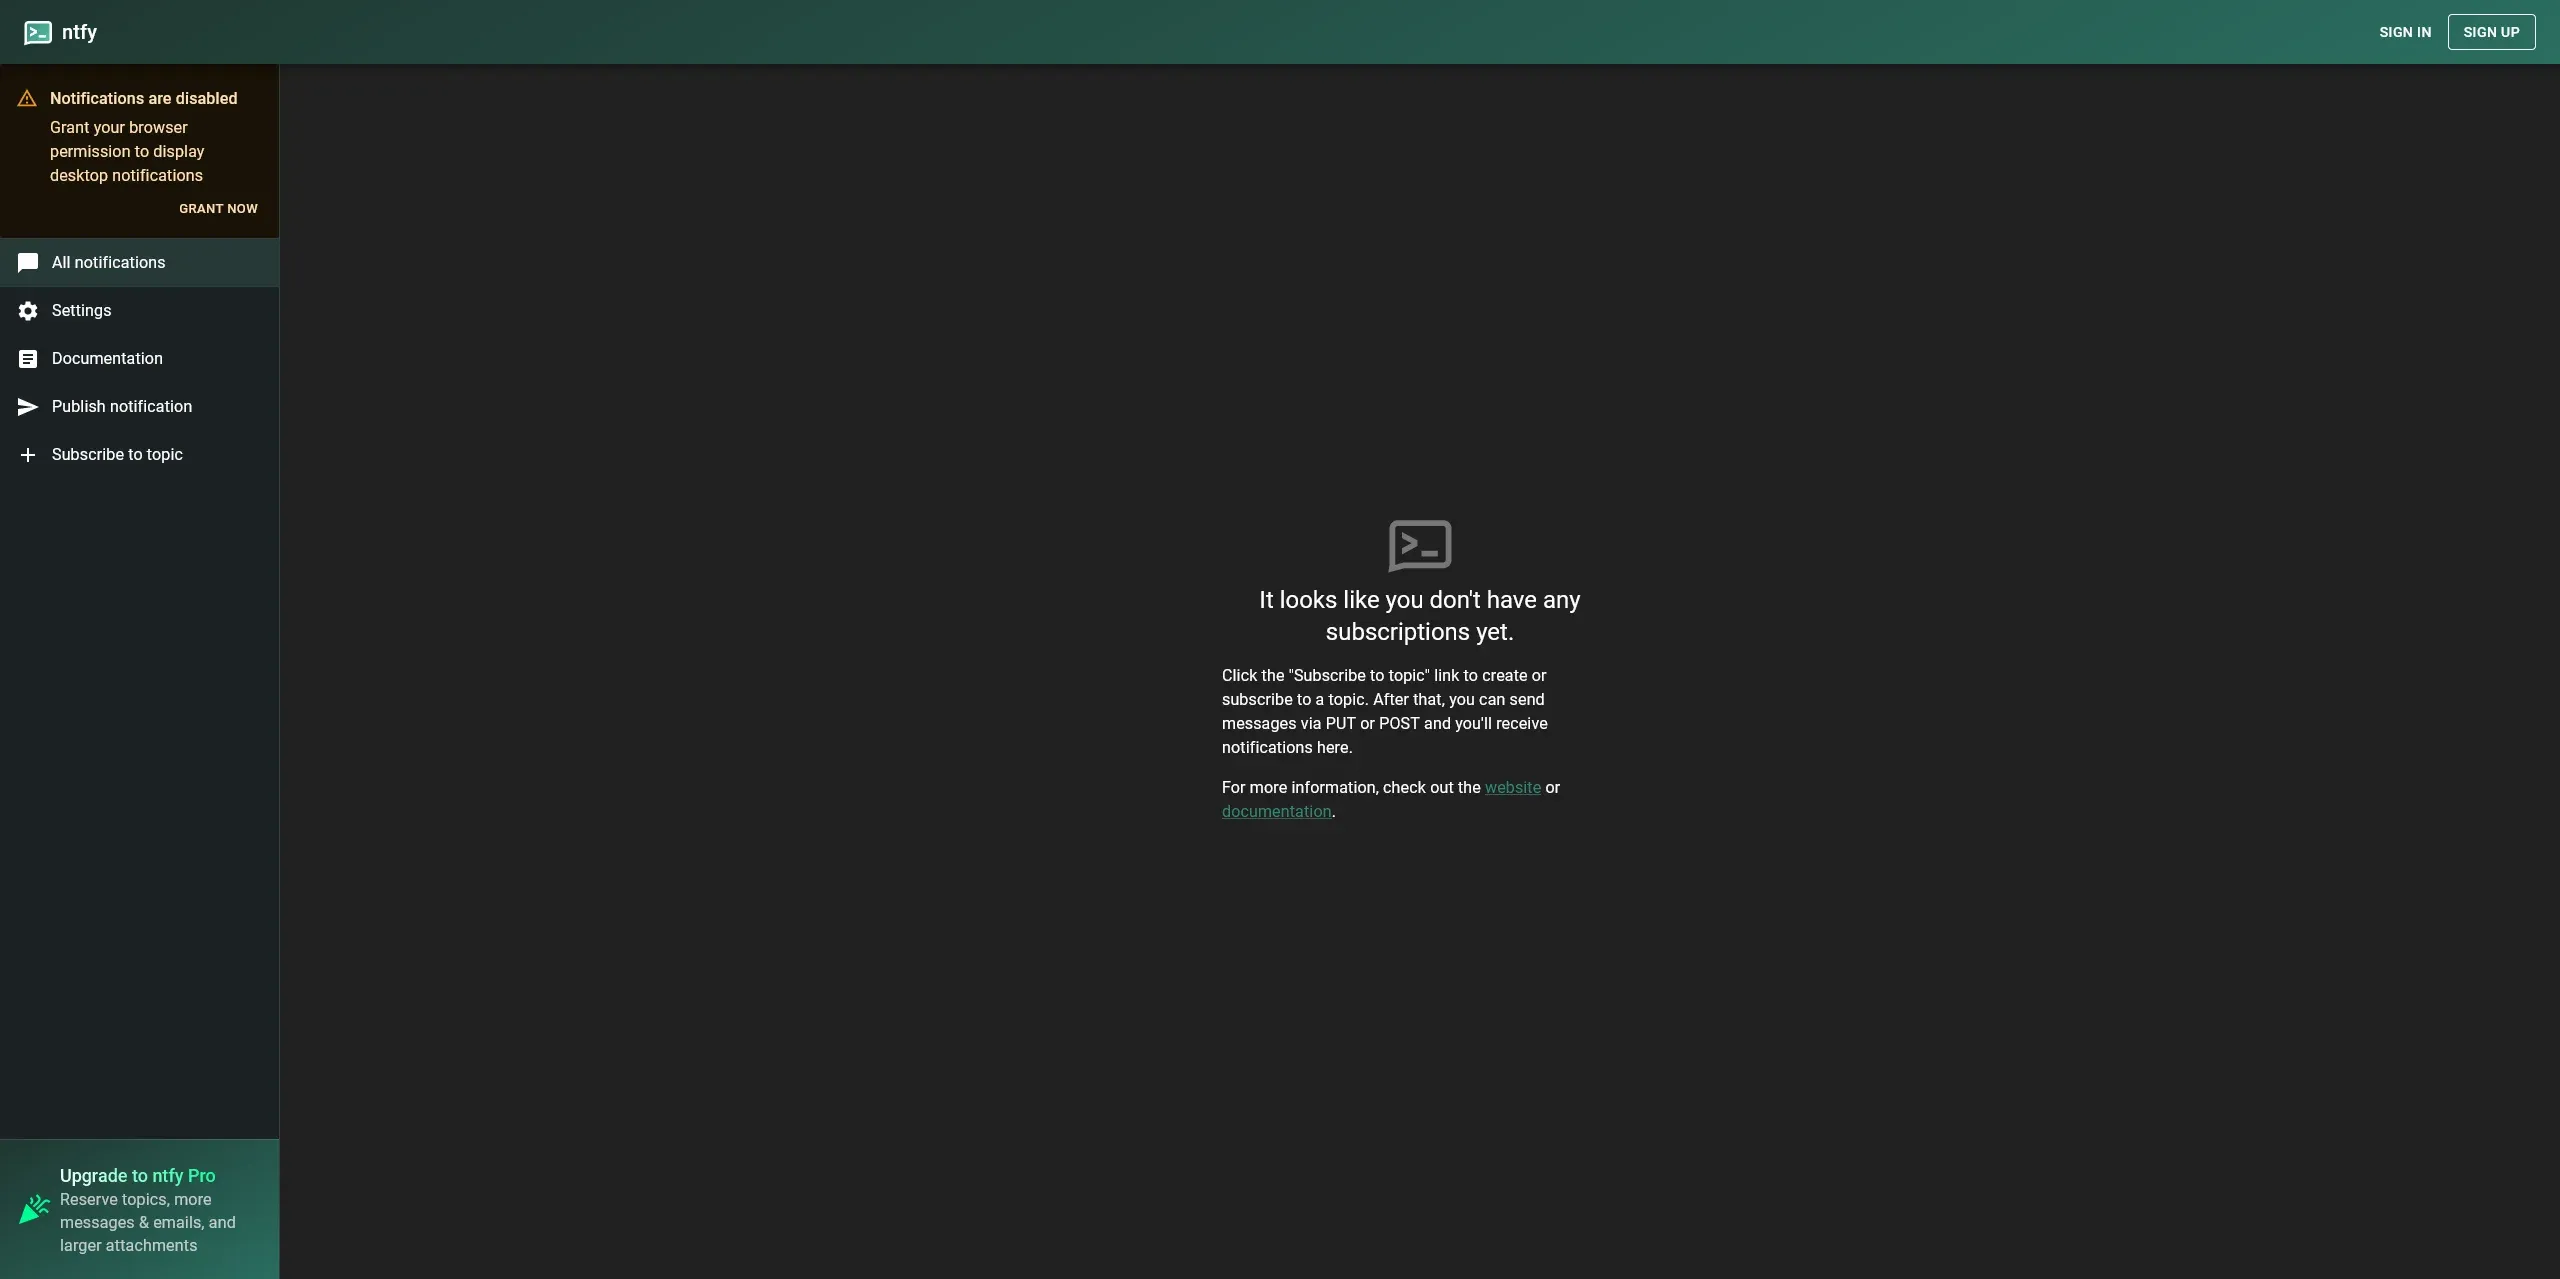 Image from ntfy.sh’s web app
If you are not using a web server to serve ntfy, you can hit the web UI at the IP:PORT of your machine hosting it.
Securing ntfy
Now that we have ntfy up and being served we can lock it down. First we need to disable the web app (skip this if you want to use the web app) since we won’t be using it. Return to the server.yml file and uncomment the web-root line. Your file should look similar to below.
default-host: "https://notify.yourdomain.com"base-url: "https://notify.yourdomain.com"listen-http: ":80"cache-file: "/var/cache/ntfy/cache.db"behind-proxy: trueattachment-cache-dir: "/var/cache/ntfy/attachments"keepalive-interval: "45s"auth-file: "/etc/ntfy/user.db"auth-default-access: "deny-all"web-root: "disable"CTRL+ x then y to save and close the file.
 Applying the above changes and refreshing your notify URL will update the page to this
Creating a User in ntfy
Since we already have the auth-file and auth-default-access set, we can skip to adding our first user. To do this we will need to execute into the ntfy container environment and run a few commands. Substitute ntfy-server-1 with the name of your container.
docker exec -it ntfy-server-1 /bin/shntfy user add yourusernameOnce inside the container invoke the ntfy cli and add your first user.
Example of creating a user using ntfy clintfy user add nameofuserInvoking this command with a username will auto prompt you to create a password for the new user. After the user is created we can subscribe it to our first notification topic.
Example of setting user access using ntfy clintfy access nameofuser ssh_logins wowo specifies the access level of the user for the topic ssh_logins. Since this user will be used to send notifications, we need to give it the ability to write to the topic. Hence, the wo = “write-only”. You can do rw for read-write, ro - read-only, and deny as well. You can change access permissions whenever, by re-running the above command with a different access level specified. Now create a second user but give it read-only permissions to the topic. This second user will be used for our mobile app.
User Access Tokens
Now at this stage the user can be used to post messages to the topic. Though, to make it even easier we are going to create a access token for the user account. This token can be used in place of the username and password when sending messages. To add an access token run the following inside the ntfy docker container.
Example of creating user access token using ntfy clintfy token add testuserWhen you receive the output, copy the token to your notes as we will need it later.
 Example of the output of the
 token add command with the token underlined in red
Type exit to leave the container interface.
Logging SSH login/logouts to ntfy
As an example for this post, I will only be covering ssh login/logout notifications to keep it short. I will include some extra scripts for other services in the blog-files repository. Now, SSH into the host you want to send notifications from and create the script file in /bin. Mark it executable and then edit it.
# Create the script filesudo touch /bin/sshd-login-ntfy# Mark it as executablesudo chmod +x /bin/sshd-login-ntfy# Edit the script filesudo nano /bin/sshd-login-ntfy#!/bin/bash
# User access token and url to post notification messagesNTFYTOKEN=NTFYURL=
# If session was opened then post this message with priority level 5if [ "${PAM_TYPE}" = "open_session" ]; then curl -H "Title: ${HOSTNAME} -- ssh login" \ -u :$NTFYTOKEN \ -H "Priority: 5" \ -H "X-Tags: warning" \ -d "user: ${PAM_USER}ip/host: ${PAM_RHOST}" \ $NTFYURLfi
# If session was closed then post this message with priority level 1if [ "${PAM_TYPE}" = "close_session" ]; then curl -H "Title: ${HOSTNAME} -- ssh logout" \ -u :$NTFYTOKEN \ -H "Priority: 1" \ -d "user: ${PAM_USER}ip/host: ${PAM_RHOST}" \ $NTFYURLfiSave and close the file: CTRL + x then y.
#!/bin/bash
# User access token and url to post notification messagesNTFYTOKEN=tk_6re713axsggyetxtg15qee1d9614zNTFYURL=https://notify.yourdomain.com/ssh_logins
# If session was opened then post this message with priority level 5if [ "${PAM_TYPE}" = "open_session" ]; then curl -H "Title: ${HOSTNAME} -- ssh login" \ -u :$NTFYTOKEN \ -H "Priority: 5" \ -H "X-Tags: warning" \ -d "user: ${PAM_USER}ip/host: ${PAM_RHOST}" \ $NTFYURLfi
# If session was closed then post this message with priority level 1if [ "${PAM_TYPE}" = "close_session" ]; then curl -H "Title: ${HOSTNAME} -- ssh logout" \ -u :$NTFYTOKEN \ -H "Priority: 1" \ -d "user: ${PAM_USER}ip/host: ${PAM_RHOST}" \ $NTFYURLfiNext we need to edit the sshd file for pam.d.
sudo nano /etc/pam.d/sshdAnd drop this into the bottom of the file.
session optional pam_exec.so /bin/sshd-login-ntfySave and close the file CTRL + x then y.
Configuring the Android Mobile App
First download the app from Google Play Store, here (f-droid), and after it installs launch it.
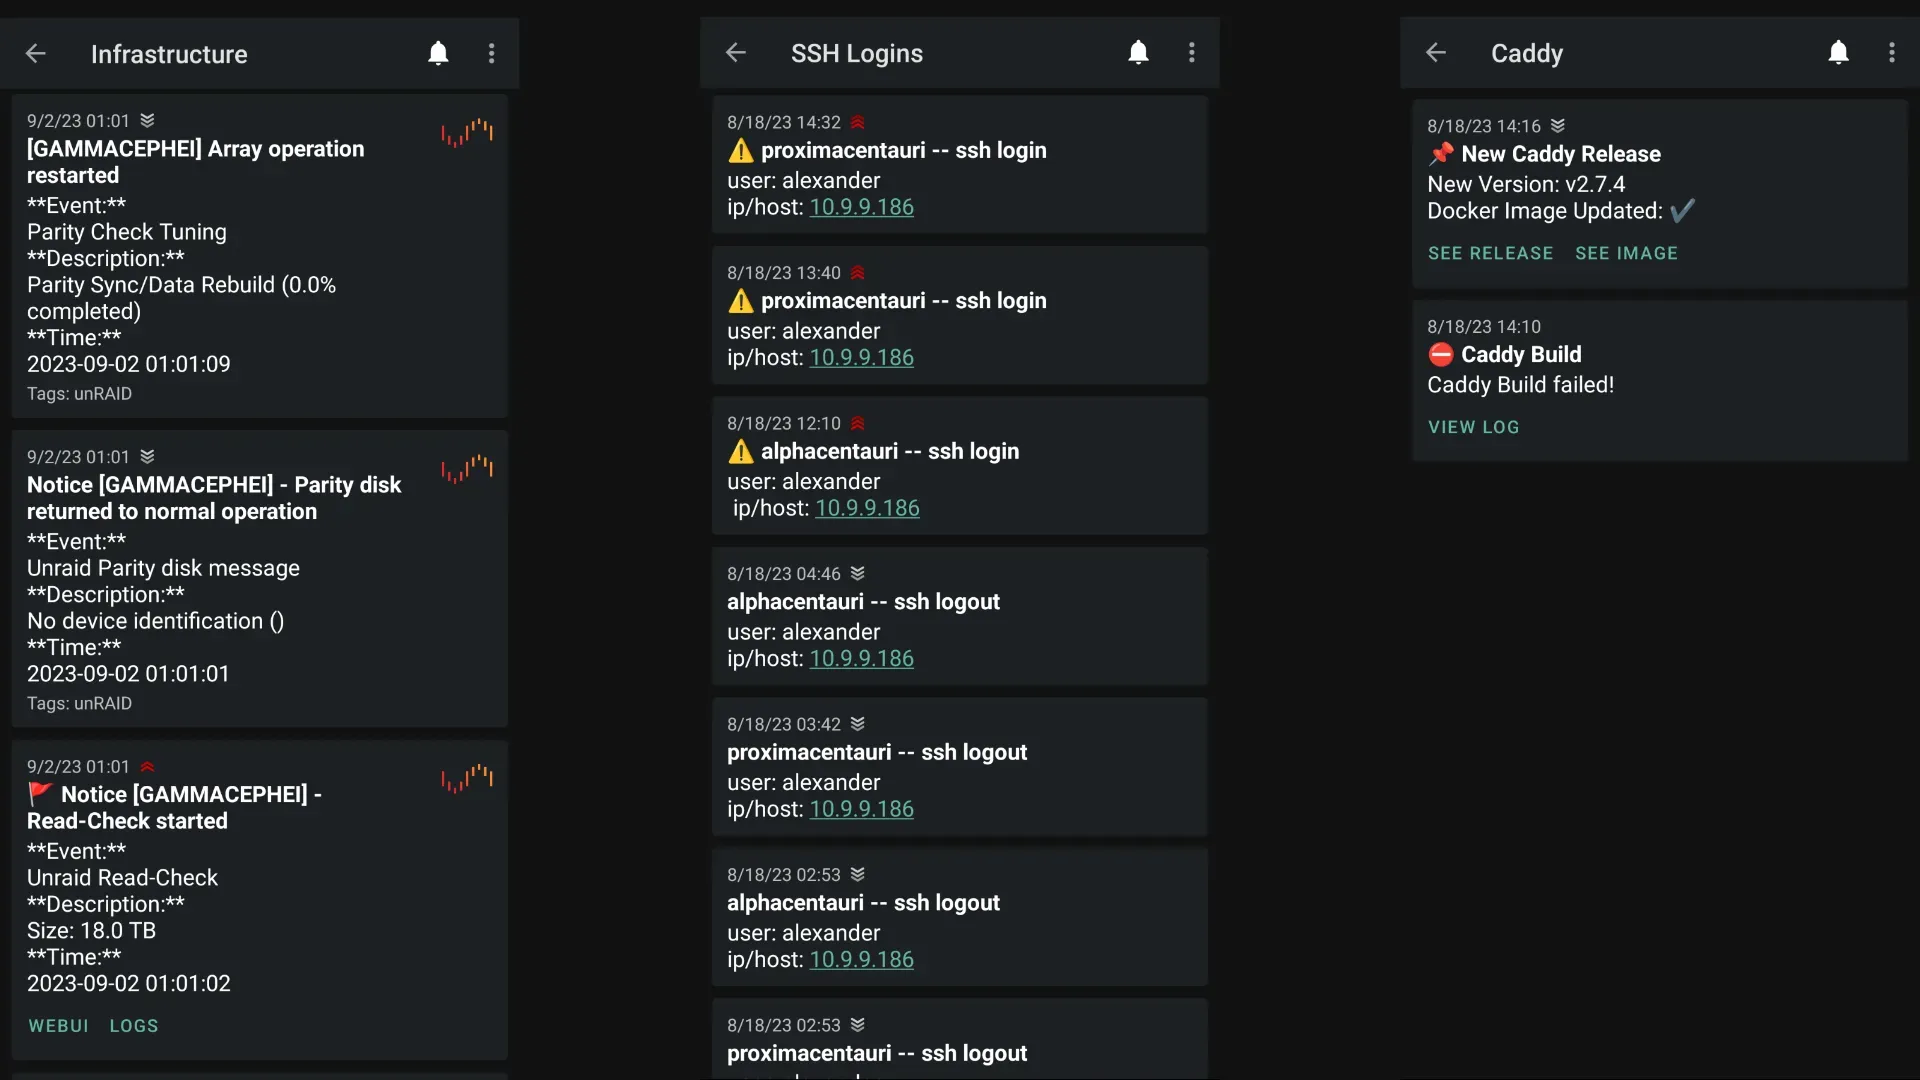
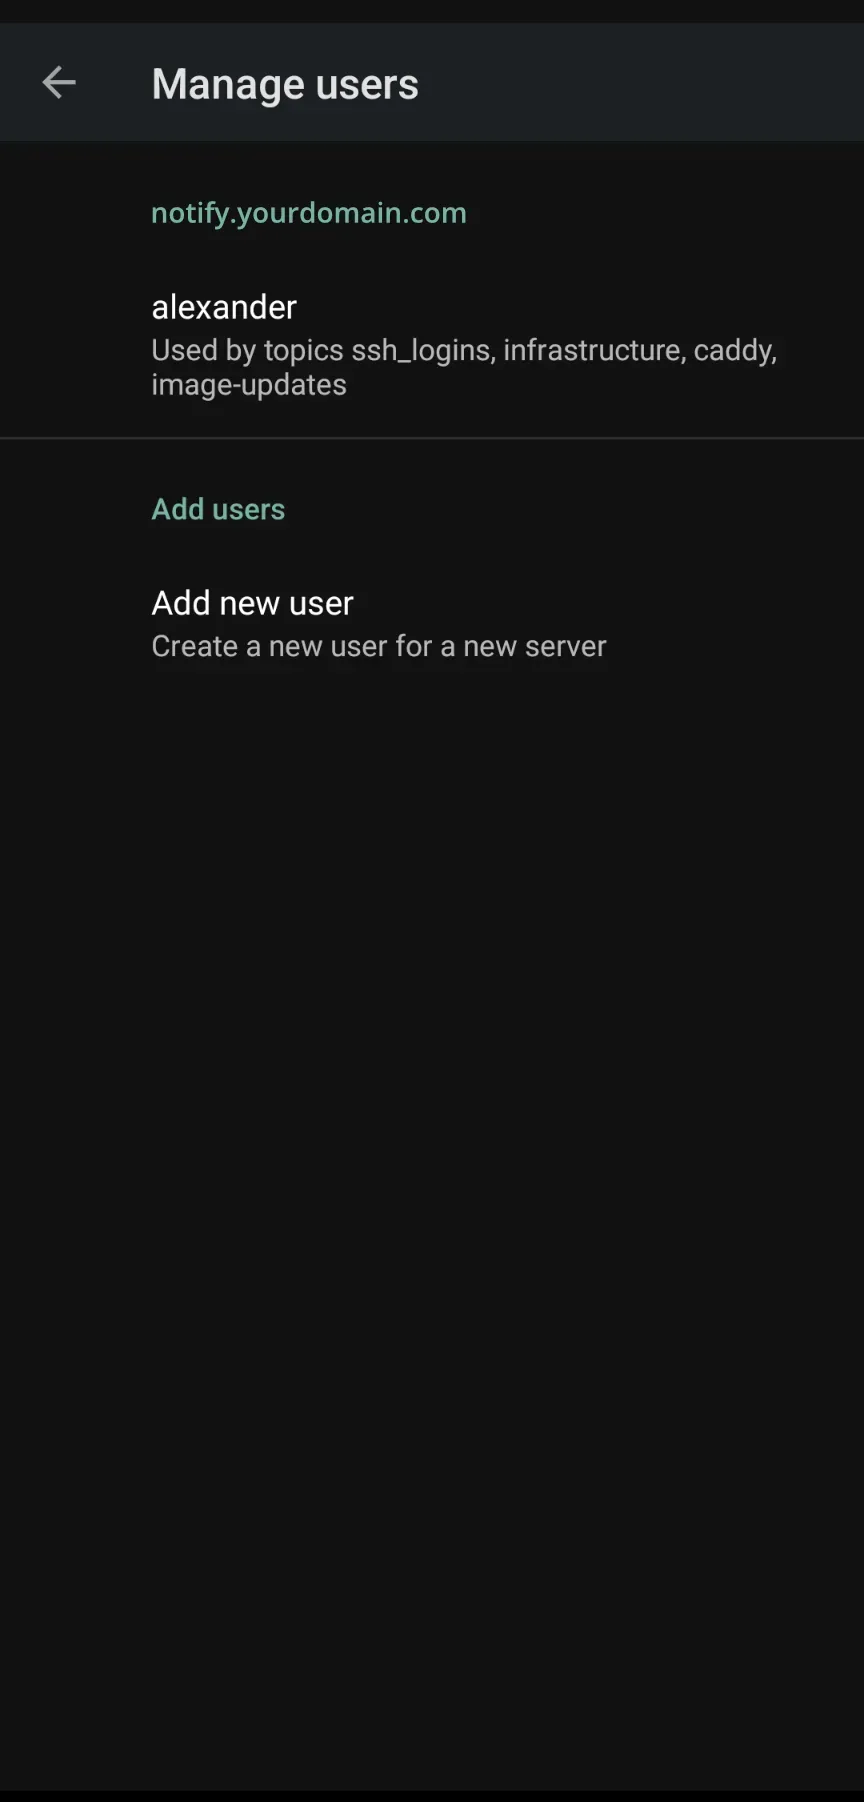 Example of the ntfy app users screen
At first launch you will be greeted by a blank screen with zero topics. To set the app up for your self-hosted instance open the settings menu (3 dot menu > settings) and go to “Manage Users” under General. Tap on “Add new user” and in the Service URL field enter the URL you used for your ntfy instance above. The Username & Password fields will be the second user you created earlier. After the fields are filled out tap “ADD USER.” Your user section should then look like the image above.
Tap the back arrow (or swipe back) and enter the “Default server” setting and enter your ntfy URL again. Now tap or swipe back to the home screen. To disable the instant delivery notification, that shows in your notification drawer, swipe up to the app switcher and long press on the ntfy app icon. Then tap “App info”. On the app settings page, tap on Notifications and disable the “Subscription Service” notification under “Other.”
Subscribing to a Topic
On the app home screen, tap on the green ”+” button and enter the name of the topic you created earlier during the user access step. Then tap “SUBSCRIBE.” If done correctly your new topic should show up on your app’s home screen.
Sending a Notification Message
We can send a notification message by either logging out of the host you used to set up ntfy (if you are doing this over ssh) or by logging into a host with the above sshd-login-ntfy script active. Or simply running:
curl -H "Title: ${HOSTNAME} -- ssh login" -u :token_here https://notify.yourdomain.com/ssh_logins -d "This is a test message"Conclusion
There is so much more you can do with ntfy, but I’ll leave that up to the imagination.. Otherwise, this post would be extremely long, haha! I will however, include more examples in the blog-files repository and the docs have great examples on how to send messages as well as services with direct integrations.
As always if you have any questions feel free to reach out via the comments or email! Happy homelabbing!
PS: If you like ntfy and end up using it, make sure to drop a tip to the dev! https://github.com/binwiederhier/ntfy#sponsors
References and other resources:
As I was working on this post Network Chuck posted a video on it. Which I have linked down below as well as another quicker (older) overview of ntfy from Kris Occhipinti.
- Video overview by NetworkChuck and Kris Occhipinti
Footnotes
My Caddy docker image includes the Cloudflare DNS plugin if you do not want to build it yourself. ↩
You can also use the binary version. Both this and the docker image are built from the source. ↩