· Alexander · Development · 14 min read
Rebuilding The Alex's Guardian Website in Astro
A quick synopsis of how I rebuilt my business site in Astro
If you are a returning reader of the blog you may remember when this first started as a simple GitHub repository. That repository used a simple static website theme for my old time Grafana guides. It then moved to WordPress, along with the launch of my business. It was then separated from the business portion and became its own WordPress instance.
However, that instance unexpectedly crashed, prompting a move to the current version, which runs on Jekyll with the Chirpy theme. Coincidentally, my business site suffered a similar fate earlier this year. When restoring from backups failed—because, well, WordPress—I decided to rebuild it from scratch. Initially, I considered using WordPress again, but a friend suggested I try Astro.
Astro is similar to Jekyll in that it generates static websites, which is perfect for my business needs. The site mainly requires a simple email contact form (still working on that part), while everything else can be static pages. The best part? The new site is incredibly tiny and fast!
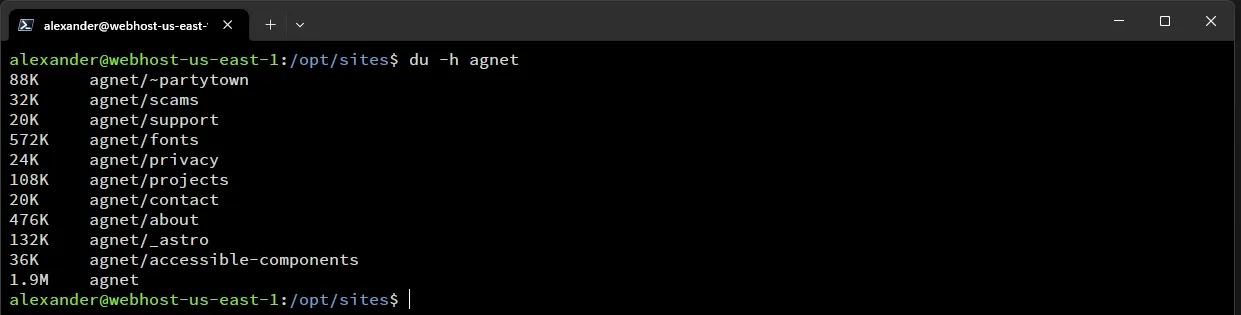 Size of the new website dir
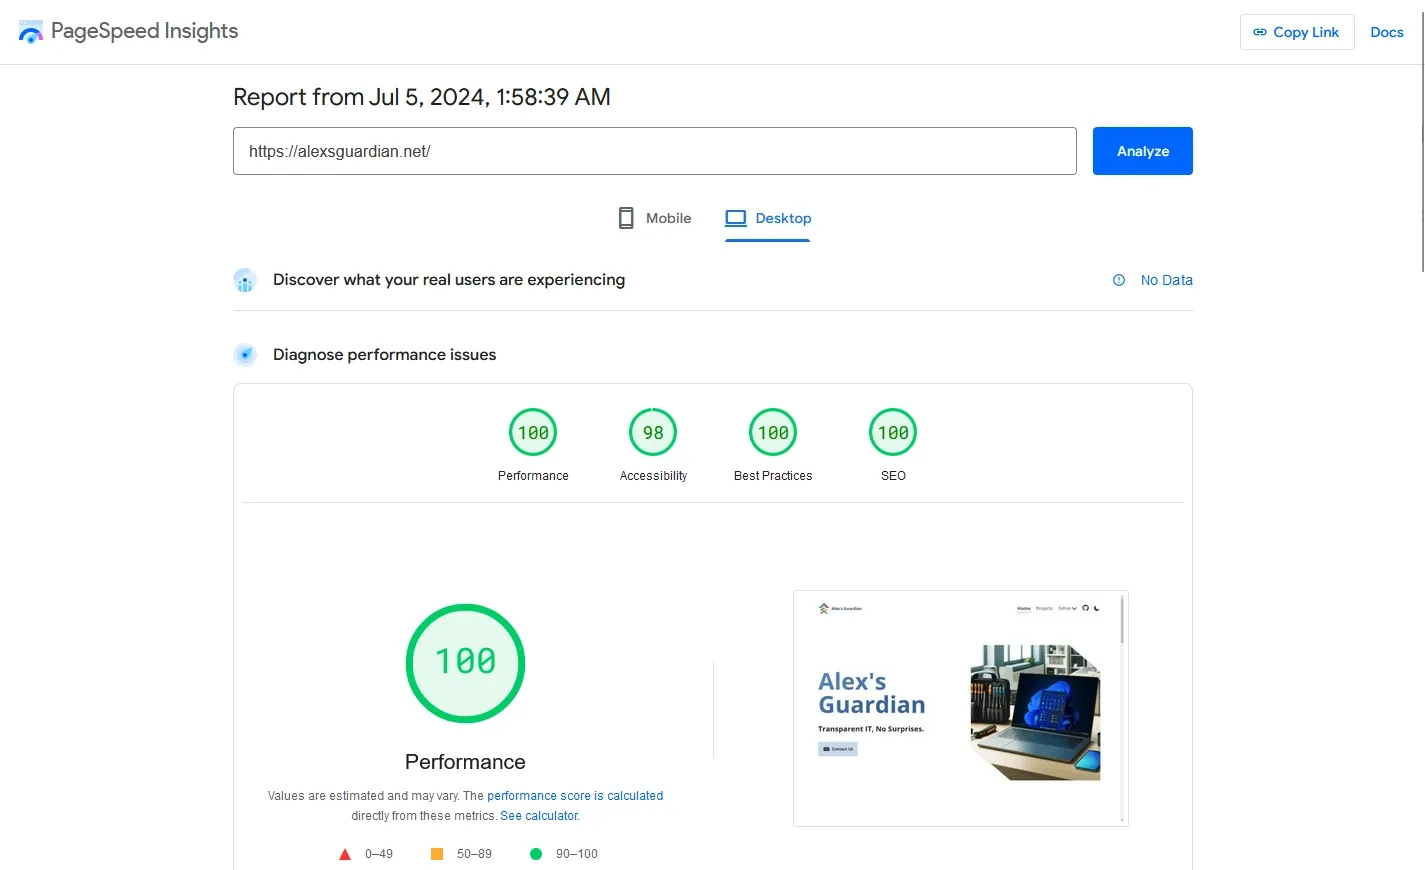 Pagespeed for agnet
Starting Out
I decided I wanted to piggyback off an existing theme rather than start from scratch. I’m not crazily experienced with web dev so using an existing theme as a starting point would allow me to get my site up faster. After hunting around for one I ended up settling on the Accessible Astro Starter theme. This theme is great as it includes accessible Astro components and is built for being, well, accessible. To begin I cloned the repository and ran npm install to install the necessary dependencies. Once that was finished I was then able to run npm run dev which would run a dev preview of the site in the browser which refreshed for live file changes.
Configuring The Theme
Once I was done getting setup it was time to get editing. The one issue I ran into early on was that most of the themes I looked at used a config.yml file to house site configuration. This theme did not, so I had to dig through all the .astro files looking for specific areas to change things. First was the global site info. This was located in the front matter of /src/layouts/DefaultLayout.astro.
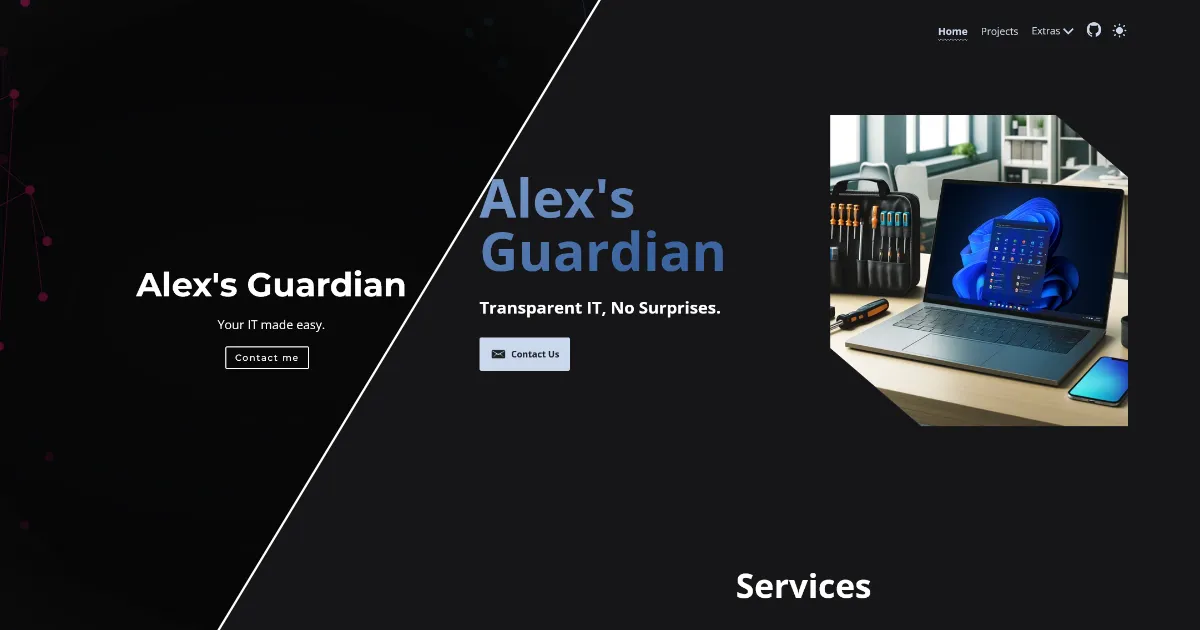
<-*/} const { title = "Alex's Guardian", description = "Alex's Guardian is an IT consulting & servicing company that specializes in end users and small businesses.", url, image = '/social-preview-image.png', author = 'Alexander Henderson', } = Astro.props<-*/}After updating the above information, I went and created a new social-preview-image.png file using the same resolution as the existing one the theme used. I then overwrote the existing file with the newly created one. I may have involved DALL-E to help generate the laptop hero image since I’m not really an artist. Not only that, I had to utilize the mesh tool in Affinity Photo to superimpose a Windows 11 desktop onto the laptop screen. No matter how much I tried with DALL-E prompts, it kept generating Windows 10 desktops. :shrug:
 Social media preview image. Also going to be the updated business card design.
Next up was to change up the default color scheme to match the one I used for the social media preview image. This was fairly straight forward as the theme used a file dedicated to colors. All I had to change was the HSL color palette located in the /src/assets/scss/_colors.scss file. Now I’m not familiar with HSL, so I utilized ChatGPT to generate the HSL palette from a base color set. I ended up having to correct it because it made the 100-500 scale base to base light. When in reality it’s base to base dark.
$colors: ( primary: ( 100: hsl(216, 46%, 58%), 200: hsl(216, 46%, 43%), 300: hsl(216, 46%, 29%), 400: hsl(216, 46%, 14%), 500: hsl(0, 0%, 0%), ), secondary: ( 100: hsl(216, 46%, 86%), 200: hsl(216, 46%, 79%), 300: hsl(216, 46%, 72%), 400: hsl(216, 46%, 65%), 500: hsl(216, 46%, 58%), ), neutral: ( 100: hsl(0 0% 100%), 200: hsl(200 23% 97%), 300: hsl(200 12% 95%), 400: hsl(205 12% 88%), 500: hsl(209 13% 83%), 600: hsl(208 6% 55%), 700: hsl(210 8% 31%), 800: hsl(212 9% 22%), 900: hsl(210 10% 14%), ), dark: ( 100: hsl(240, 4%, 9%), ),);Down the road I plan on hiring a graphic designer to spruce everything up for me properly. But for now it works, and it only cost me my time, a bunch of Google searching, and occasionally going back and forth with chatgpt 4o.
Then it was onto updating the homepage and hero section. This was also easy as the homepage was located in /src/pages/index.astro and the hero section in /src/components/Hero.astro. The hero section updates consisted of updating the site info and commenting out an extra button I wasn’t going to be using.
<section class="hero my-24"> <div class="container"> <div class="grid grid-cols-1 items-center gap-24 lg:grid-cols-2"> <div class="flex flex-col items-center gap-8 md:items-start"> <h1 class="text-center text-6xl md:text-left lg:text-8xl"> <slot><span class="text-gradient">Alex's Guardian</span></slot> </h1> <h3> <slot>Transparent IT, No Surprises.</slot> </h3> <div class="flex flex-col gap-3 min-[500px]:flex-row"> <a class="button has-icon color-secondary" href="mailto:info@alexsguardian.net"> <Icon name="ion:email" /> Contact Us </a> {/* <a class="button has-icon color-secondary" href="https://github.com/markteekman/accessible-astro-starter/blob/main/README.md" > <Icon name="ion:bookmark-outline" /> Read the Docs </a> */} </div> </div> <img class="hidden lg:block" src={src} alt="Laptop on a desk with a toolbag next to it" loading="lazy" decoding="async" height="743" width="710" /> </div> </div></section>The index edits consisted of just listing out some of the services my business offers using some feature components. You can find that file on the git repo here. The call-out component got a quick update as well, so the button would link to my contact email. This will eventually link to the contact page once I figure out the form side of things.
Lastly, I had to update the site metadata so that it would properly show up when shared on social media pages, etc. This was done by editing the /src/components/SiteMeta.astro file.
  ---  import { ViewTransitions } from 'astro:transitions'
  const { title, description, url, image, author } = Astro.props
  let subtitle = "Alex's Guardian"  let domain = 'alexsguardian.net'  ---
  {/* general meta */}  <meta name="title" content={`${subtitle} - ${title}`} />  <meta name="description" content={description} />  <meta name="author" content={author} />
  {/* open graph */}  <meta property="og:url" content={url} />  <meta property="og:type" content="website" />  <meta property="og:title" content={`${subtitle} - ${title}`} />  <meta property="og:description" content={description} />  <meta property="og:image" content={Astro.site ? `${Astro.site}${image}` : image} />
  {/* twitter card */}  <meta name="twitter:card" content="summary_large_image" />  <meta property="twitter:domain" content={domain} />  <meta property="twitter:url" content={url} />  <meta name="twitter:title" content={`${subtitle} - ${title}`} />  <meta name="twitter:description" content={description} />  <meta name="twitter:image" content={Astro.site ? `${Astro.site}${image}` : image} />
  {/* page title */}  <title>{subtitle} - {title}</title>
  <ViewTransitions />
The file defines the info for general metadata, Open Graph (fairly common meta integration for sites), a dedicated X (formerly known as Twitter) card setup, and finally the page title info. I ended up setting a dev site to push changes to test the metadata changes using the open graph site. It also came in handy when I was diagnosing Cloudflare caching issues.
Setting Up The Dev/Prod Deployments
This was fairly straight forward as most of the work was already done when I created the blog workflow. It was mostly copying/pasting the workflow over and doing a few minor changes. If you want to see the blog workflow, albeit slightly outdated, you can find it here.
name: Deploy Site
on: push: branches: - dev - main
jobs: prod: if: github.ref =='refs/heads/main' && !contains(github.event.head_commit.message, '!noci') runs-on: ubuntu-latest steps: - name: checkout repo uses: actions/checkout@v4
- name: setup node uses: actions/setup-node@v4 with: node-version: '20.12.1' cache: 'npm'
- name: Public IP id: ip uses: candidob/get-runner-ip@v1.0.0
- name: Setup Linode Cloud Firewall uses: linode/action-linode-cli@v1 with: token: "${{ secrets.LINODE_CLI_TOKEN }}"
- name: build prod id: build run: | wget -O ./public/testimonials.json ${{ secrets.TESTIMONIAL_JSON_URL }} sed -i -e 's#{GA-ID}#'${{ secrets.GOOGLE_ANALYTICS_ID }}'#g' ./src/layouts/DefaultLayout.astro npm install npm run build
- name: Setup SSH id: ssh-setup run: | mkdir ~/.ssh touch ~/.ssh/known_hosts echo ${{ secrets.LINODEFINGERPRINT }} >> ~/.ssh/known_hosts
- name: Open Linode Cloud Firewall for GH if: (steps.ssh-setup.outcome == 'success') id: linode-fw-open env: PUB_IP: "${{ steps.ip.outputs.ipv4 }}/32" HOME_IP: "${{ secrets.HOMEIP }}" LINODE_FW_ID: "${{ secrets.LINODE_FW_ID }}" run: | wget https://raw.githubusercontent.com/alexandzors/utils/main/linode-scripts/linode.sh bash ./linode.sh -a --verbose
- name: deploy site uses: burnett01/rsync-deployments@7.0.1 id: deploy with: switches: -avr path: ./dist/ remote_path: /opt/sites/agnet/ remote_host: ${{ secrets.LINODEHOST }} remote_port: 22 remote_user: ${{ secrets.LINODEUSER }} remote_key: ${{ secrets.LINODESSHKEY }}
- name: Close Linode Cloud Firewall for GH if: always() id: linode-fw-close env: PUB_IP: "${{ steps.ip.outputs.ipv4 }}/32" HOME_IP: "${{ secrets.HOMEIP }}" LINODE_FW_ID: "${{ secrets.LINODE_FW_ID }}" run: | bash ./linode.sh -d --verbose
dev: if: github.ref =='refs/heads/dev' && !contains(github.event.head_commit.message, '!noci') runs-on: ubuntu-latest steps: - name: checkout repo uses: actions/checkout@v4
- name: setup node uses: actions/setup-node@v4 with: node-version: '20.12.1' cache: 'npm'
- name: Public IP id: ip uses: candidob/get-runner-ip@v1.0.0
- name: Setup Linode Cloud Firewall uses: linode/action-linode-cli@v1 with: token: "${{ secrets.LINODE_CLI_TOKEN }}"
- name: build dev id: build run: | sed -i -e 's#alexsguardian.net#dev.alexsugardian.net#g' ./src/components/SiteMeta.astro sed -i -e 's#{GA-ID}#'${{ secrets.GOOGLE_ANALYTICS_ID_DEV }}'#g' ./src/layouts/DefaultLayout.astro sed -i '51i \ \ \ \ <Announcement />' ./src/layouts/DefaultLayout.astro npm install npm run build
- name: htmlproofer test uses: chabad360/htmlproofer@master id: html-testing with: directory: "./dist/" arguments: --disable-external --checks --allow-hash-href --ignore_urls "/^http:\/\/127.0.0.1/,/^http:\/\/0.0.0.0/,/^http:\/\/localhost/"
- name: psi mobile test uses: stefafafan/psi-action@v1 id: psi-m-testing with: url: "https://dev.alexsguardian.net" strategy: mobile key: ${{ secrets.PS_KEY }}
- name: psi desktop test uses: stefafafan/psi-action@v1 id: psi-d-testing with: url: "https://dev.alexsguardian.net" strategy: desktop key: ${{ secrets.PS_KEY }}
- name: Setup SSH id: ssh-setup run: | mkdir ~/.ssh touch ~/.ssh/known_hosts echo ${{ secrets.LINODEFINGERPRINT }} >> ~/.ssh/known_hosts
- name: Open Linode Cloud Firewall for GH if: (steps.ssh-setup.outcome == 'success') id: linode-fw-open env: PUB_IP: "${{ steps.ip.outputs.ipv4 }}/32" HOME_IP: "${{ secrets.HOMEIP }}" LINODE_FW_ID: "${{ secrets.LINODE_FW_ID }}" run: | wget https://raw.githubusercontent.com/alexandzors/utils/main/linode-scripts/linode.sh bash ./linode.sh -a --verbose
- name: deploy site uses: burnett01/rsync-deployments@7.0.1 id: deploy with: switches: -avr path: ./dist/ remote_path: /opt/sites/agnet-dev/ remote_host: ${{ secrets.LINODEHOST }} remote_port: 22 remote_user: ${{ secrets.LINODEUSER }} remote_key: ${{ secrets.LINODESSHKEY }}
- name: Close Linode Cloud Firewall for GH if: always() id: linode-fw-close env: PUB_IP: "${{ steps.ip.outputs.ipv4 }}/32" HOME_IP: "${{ secrets.HOMEIP }}" LINODE_FW_ID: "${{ secrets.LINODE_FW_ID }}" run: | bash ./linode.sh -d --verboseAs you can see the workflows are combined into a single file for both prod and dev. It checks what branch has the changes and determines which job to run based on that. There isn’t much difference besides removing the dev site banner and updating the Google Analytics ID to the production one. I also have page speed testing, but it’s not reporting the results/failing the runs if it comes back bad. The eventual goal with page speed is to have it test the site after deploying on dev, and if it fails, revert the changes and fail the workflow run. Right now its just kind of there.
Creating New Pages
Next up on the list of things to do was to create some new pages. This was easy enough by creating new .astro files in the /src/pages/ directory. Each new page imports the DefaultLayout component from the DefaultLayout.astro file. For now the site has a homepage, about page, scams (because scammers seem to like spoofing my business #..), privacy policy, and projects. Below is an example of what a simple page setup looks like using the new 404 page.
---import DefaultLayout from '../layouts/DefaultLayout.astro'---
<DefaultLayout title="404">  <section class="my-12">    <div class="container" style="display: flex; justify-content: center;">      <h1>404</h1>    </div>  </section>  <section class="my-12">    <div class="space-content container" style="display: flex; justify-content: center;">      <p class="text-2xl">Oops! That page does not exist. We logged it so you don't have to worry.</p>    </div>    <div class="space-content container" style="margin-top: 2rem; display: flex; justify-content: center;">      <a class="button" href="/">Return home</a>    </div>  </section></DefaultLayout>
As you can see in the 404 page above, the DefaultLayout component gets imported and then used as the base layer. Everything else lives inside the DefaultLayout component.
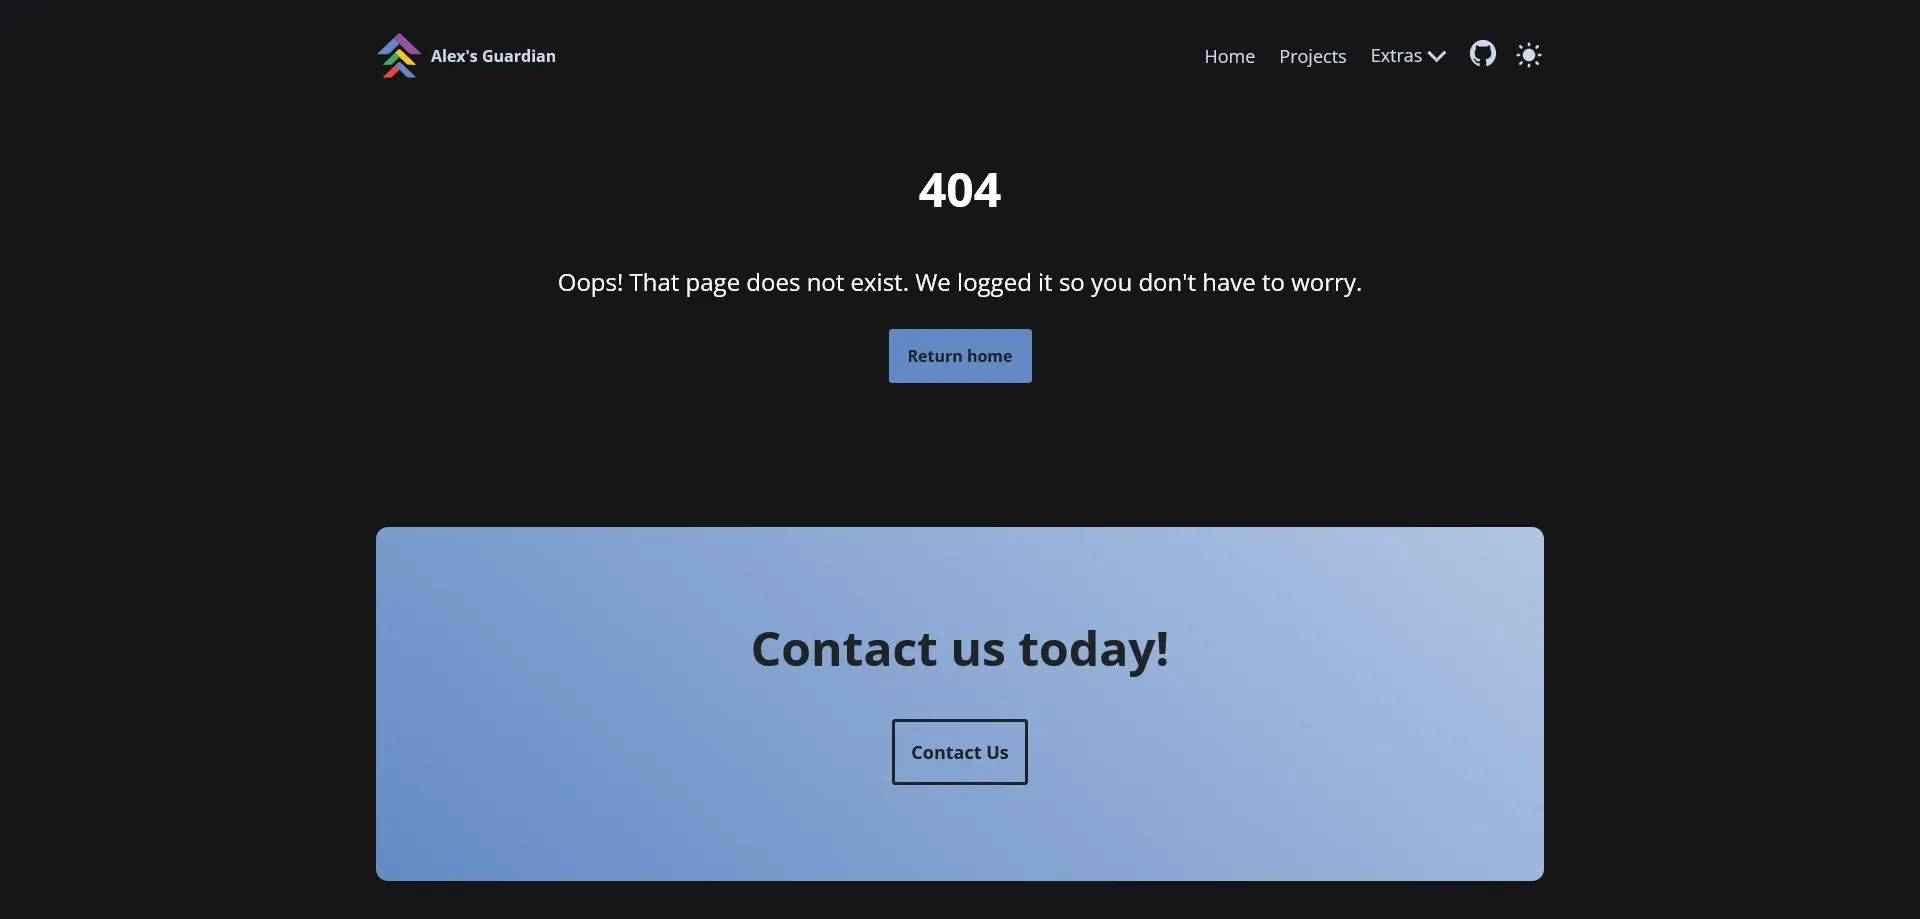 404 Page
After the pages were created all I had to do was update the page navigation, so they’d appear in the menu / header.
---import Navigation from '../components/Navigation.astro'import { SkipLinks } from 'accessible-astro-components'import { Icon } from 'astro-icon/components'---
<header>  <SkipLinks />  <Navigation>    <li class="menu-item">      <a href="/">Home</a>    </li>    <li class="menu-item">      <a href="/projects/">Projects</a>    </li>    {/* Add back once the contact page is complete.    <li class="menu-item">      <a href="/contact/">Contact</a>    </li>    */}    <li class="menu-item has-dropdown">      <button aria-haspopup="true" aria-expanded="false">Extras</button>      <ul class="dropdown-menu">        <li class="submenu-item">          <a href="/about/">About</a>        </li>        <li class="menu-item">          <a href="https://blog.alexsguardian.net" title="external link" rel="external noopener noreferrer"            >Alex's Blog</a          >        </li>        <li class="submenu-item">          <a href="/scams/">Scams</a>        </li>        {/* Add back once the support page is complete.        <li class="menu-item">          <a href="/support/">Support</a>        </li>         */}        <li class="menu-item">          <a href="/privacy/">Privacy Policy</a>        </li>      </ul>    </li>    <li class="menu-item type-icon">      <a href="https://github.com/alexandzors/astro-agnet" title="Website Repository">        <Icon name="ion:logo-github" />      </a>    </li>  </Navigation></header>
<style lang="scss" is:global>  @use '../assets/scss/base/outline' as *;
  header {    .type-icon a {      display: block;
      [data-icon] {        height: auto;        margin-top: -4px;        width: 30px;
        path {          fill: var(--action-color);        }      }
      &:hover {        [data-icon] path {          fill: var(--action-color-state);        }      }    }  }</style>
Creating Custom Components
One of the things this theme did not have was a scroller/carousel (for testimonials/ratings). Which means I had to create one from scratch. It was easy enough to create a new component as it’s a similar process to new pages. The component files live in the /src/components directory instead of the /src/pages one.
Since me and well ‘coding’ don’t mix. I ended up going back and forth with ChatGPT 4o on various issues I was encountering while making the carousel component. This is probably not the best way to do it but its working well enough in its current state.
<div class="carousel" aria-roledescription="carousel"> <div class="carousel-track" id="carousel-track"> {testimonials.map((testimonial, index) => ( <div class="carousel-slide" role="group" aria-roledescription="slide" aria-label={`Slide ${index + 1} of ${testimonials.length}`} key={index}> <strong>{testimonial.title}</strong> <p>{testimonial.testimonial}</p> <p>- {testimonial.name}</p> <div class="stars"> {Array.from({ length: 5 }, (_, i) => ( <Icon key={i} name={i < testimonial.rating ? 'ion:star' : 'ion:star-outline'} class="star" /> ))} </div> </div> ))} </div> <button class="carousel-button prev" id="prevButton" aria-label="Previous slide">❮</button> <button class="carousel-button next" id="nextButton" aria-label="Next slide">❯</button></div>
<script is:inline> (function() { let track = document.getElementById('carousel-track'); let slides = Array.from(track.children); let nextButton = document.getElementById('nextButton'); let prevButton = document.getElementById('prevButton');
let currentIndex = 0;
const moveToSlide = (index) => { let amountToMove = -index * track.clientWidth; track.style.transform = `translateX(${amountToMove}px)`; };
const autoScroll = () => { currentIndex = (currentIndex + 1) % slides.length; moveToSlide(currentIndex); };
const nextButtonClickHandler = () => { currentIndex = (currentIndex + 1) % slides.length; moveToSlide(currentIndex); };
const prevButtonClickHandler = () => { currentIndex = (currentIndex - 1 + slides.length) % slides.length; moveToSlide(currentIndex); };
nextButton.addEventListener('click', nextButtonClickHandler); prevButton.addEventListener('click', prevButtonClickHandler);
let autoScrollInterval = setInterval(autoScroll, 5000);
track.addEventListener('mouseenter', () => { clearInterval(autoScrollInterval); });
track.addEventListener('mouseleave', () => { autoScrollInterval = setInterval(autoScroll, 5000); });
window.addEventListener('resize', () => { moveToSlide(currentIndex); });
// Cleanup function to remove event listeners window.addEventListener('beforeunload', () => { nextButton.removeEventListener('click', nextButtonClickHandler); prevButton.removeEventListener('click', prevButtonClickHandler); clearInterval(autoScrollInterval); }); });</script>If you want to see the component in detail you can check out the file here. The deployment process for production pulls a JSON file that the testimonial component uses for the actual data. This JSON file is updated automatically on feedback from my clients when they utilize the form link provided on invoices. Though at the moment this only updates when a new version of the production site is ‘released’.
So What’s Next And Other Thoughts?
There are a few things I need to finish on the site to make it 100% complete. One being the project page gallery component (so I can add more projects), and the other being a proper contact form. For now the site is functional and looks good compared to the old WordPress site.
Having the site also be lightweight / static allowed me to consolidate my Linode ref link :) hosting. The old site used to run on a dedicated Linode VM running Docker. Now it lives on the same host as my blog and is directly served by Caddy. Eventually I’ll move image storage to either a CDN or some sort of object storage. Maybe when I migrate the blog to Astro?
Site run throughI know it’s been awhile again since my last post. Life these past few years has gotten extremely busy, and sometimes I just do not have the energy to sit down to write a blog post. I’ve also been slowly rebuilding my Grafana stack (with Loki and that jazz) on a new dedicated host I acquired last month. Once that’s done I plan to FINALLY redo my Grafana guide series using the most up-to-date versions of everything. I’ll also be writing up a post about getting 2.5gb networking on my Dell Optiplex micro lab soon. So stay tuned for those!