· Alexander · Homelab · 8 min read
My Journey to Immich - Self-Hosted Photo Management
How I transitioned from Google Photos to Immich for self-hosted photo management.

Like many others, I’ve been a long-time user of Google Photos. But with the ever-increasing costs of cloud storage (thanks, Google, for killing off unlimited storage for Pixel owners 😢) and growing concerns over data privacy, I decided to explore self-hosted alternatives for managing my photo and video library.
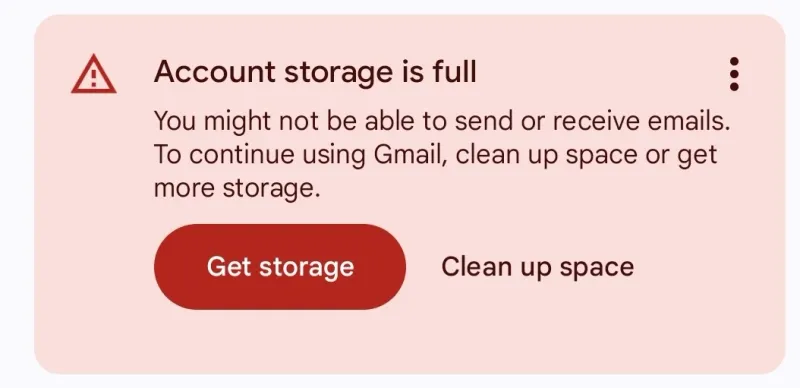
I was also getting tired of seeing the Account Storage is full message.
Why Immich?
There were several reasons why I chose Immich as my self-hosted photo management solution:
- Open Source: Immich is open-source, which means I have full control over my data and can customize the software to fit my needs.
- Feature-Rich: Immich offers a plethora of features such as automatic backups, facial recognition, geotagging, and album creation, which are comparable to Google Photos.
- Active Development: The Immich community is active, and the developers frequently release updates and new features.
- Ease of Use: The user interface (+ mobile apps) is intuitive and user-friendly, making it easy for my wife and me to navigate and manage our media.
- Ease of Sharing: Immich makes it simple to share albums and photos with friends and family, similar to Google Photos.
- Third-Party Tooling: Immich has a lot of awesome third-party tools and integrations that enhance its functionality, such as Immich Proxy and Immich-Go.
There are other options out there like PhotoPrism, Lychee, Plex, Nextcloud Photos, Synology Photos, and more. But after testing a few of them out, Immich just felt like the best fit for my family’s needs. Especially since my wife isn’t as tech-savvy, so having a straightforward and easy-to-use interface was crucial.
Setting Up / Deploying Immich
I built a dedicated media server a while ago using Unraid to run Plex and its companion apps (see my previous post for specs). The array was set up specifically for TV, movie, and music storage, so I hadn’t originally planned to move our photo and video libraries onto it. With my own library around 500GB and my wife’s nearly 1TB, it was clear we needed more space. So, like any true homelabber, I bought new hardware for the project! 😉
While researching migration options and planning the setup, Ubiquiti released their Gen 1 NAS device—perfect timing, just like with my cluster build. It almost felt intentional. My old Synology NAS was outdated and couldn’t handle the storage demands, so I picked up a 7-bay UNAS Pro and filled it with 8TB Seagate Ironwolf drives from the previous NAS, plus a new one from Amazon. Ubiquiti has since released even better Gen 2 devices with upgraded hardware and SSD bays for caching, but the Gen 1 fits my needs perfectly. Another bonus: it supports backups to other UNAS devices or cloud providers like Backblaze B2, S3, and more—which I’ll use to back up my Immich library to Backblaze.
Deploying Immich to Unraid was a breeze thanks to the Docker Compose Plugin and Immich’s official Docker Compose file. I also used the Unassigned Devices plugin to mount the UNAS via SMB for storage.
Immich Setup on Unraid with UNAS Storage
click/tap to enlarge
Configuring Immich Access
For my setup, I decided to use password authentication for now. While I do have Authelia deployed with LDAP-S, it’s not yet fully integrated into my lab and is only connected to a few external services. I didn’t want Immich to be publicly accessible, so I configured some routing rules in Caddy to restrict access to just my wife’s and my phones. The Immich mobile apps let you set custom proxy headers, so our phones send two headers with each connection: X-DEVICE-NAME and X-DEVICE-TOKEN. Caddy checks for the token header on each request. If it’s present, the request is forwarded to Immich; if not, the user is redirected to my external base domain.
*.domain.com { import tls encode gzip log { output file /etc/caddy/logs/wildcard.log { roll_size 50mb roll_keep 5 roll_keep_for 24h } }
@pics host pics.domain.com
handle @pics { @ext-1 { header X-Device-Token <some-device-token> } @ext-2 { header X-Device-Token <some-device-token> } handle @ext-1 { reverse_proxy https://immich.internal-domain.com { header_up Host {upstream_hostport} header_up X-Forwarded-For {remote_host} header_up X-Forwarded-Proto {scheme} transport http { tls } import cf-ip-map } } handle @ext-2 { reverse_proxy https://immich.internal-domain.com { header_up Host {upstream_hostport} header_up X-Forwarded-For {remote_host} header_up X-Forwarded-Proto {scheme} transport http { tls } import cf-ip-map } } handle { redir https://domain.com } }}I set things up this way to avoid maintaining an always-on VPN on both our phones just to enable automatic backups while on cellular. It’s not the most elegant solution, but it works for now. I also have HTTPS configured internally, since Immich runs on the Unraid box and my external Caddy instance is hosted on my swarm cluster—keeping traffic encrypted end-to-end.
Immich Proxy
Immich Proxy is a third-party integration that lets you share your Immich media without publicly exposing your server. Which is exactly what I need since mine isn’t technically public. I haven’t gotten it working with my Caddy setup yet, but I plan to keep experimenting and will update this post once I do.
Email Notifications
This step is completely optional, but I wanted the ability to send email notifications for shared album access and other alerts. To do this, I hooked Immich up to Brevo using their free tier. I hate the idea of managing my own email server, and Brevo makes it super easy to relay emails from self-hosted apps without tying them to a personal email account.
Migrating from Google Photos to Immich
The migration process was fairly straightforward thanks to Immich-Go. First, I used Google Takeout to export all my photos and videos. Once I had the files, I moved them to my Unraid box, extracted them (since they were in the wrong format), downloaded Immich-Go, and did a dry-run import to check how many files would be processed and if any would have issues.
#!/bin/bash
./immich-go upload from-google-photos \ --server=http://localhost:2283 \ --tag="Source/GooglePhotos" \ --tag="Import/$(date +%Y-%m-%d)" \ --api-key=<service-api-key> \ --concurrent-tasks=6 \ --client-timeout=60m \ --pause-immich-jobs=true \ --on-errors=continue \ --session-tag \ --manage-burst=Stack \ --log-level=WARN \ --dry-run \ --log-file=./dry-upload-$(date +%Y%m%d).log \ ./Takeout/*Immich-go requires an Immich API key which can be generated from your user settings. It needs the following permissions (as of writing this post):
- asset.create
- asset.delete
- asset.read
- asset.statistics
- asset.update
- asset.upload
- asset.copy
- asset.replace
- asset.delete
- asset.download
- album.create
- album.read
- albumAsset.create
- server.about
- stack.create
- tag.asset
- tag.create
- user.read
- job.create
- job.read
The dry run showed everything looked good except for 22 files which were missing their sidecar .json metadata files. After confirming the dry run results I proceeded with the actual import by removing the --dry-run flag.
./immich-go upload from-google-photos \ --server=http://localhost:2283 \ --tag="Source/GooglePhotos" \ --tag="Import/$(date +%Y-%m-%d)" \ --api-key=<service-api-key> \ --concurrent-tasks=6 \ --client-timeout=60m \ --pause-immich-jobs=true \ --on-errors=continue \ --session-tag \ --manage-burst=Stack \ --log-level=WARN \ --log-file=./upload-$(date +%Y%m%d).log \ ./Takeout/*The import took several hours to complete due to the large number of files and the fact that the Immich library is not on SSDs. But once it was done, I had all my photos and videos in Immich, complete with metadata, albums, and facial data. I plan to repeat the same process with my wife’s library soon, since her takeout export is going to be much, much larger. 😅
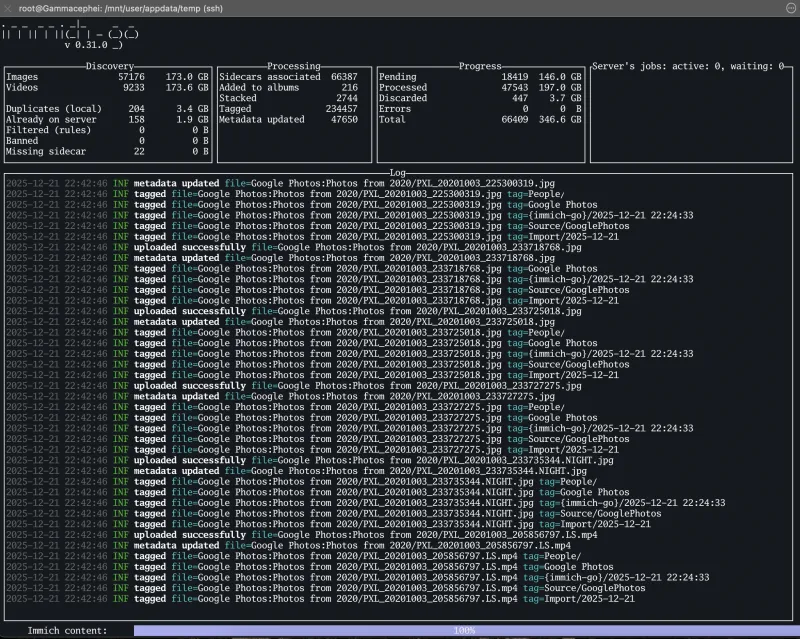 Immich-Go importing files into the Immich server.
 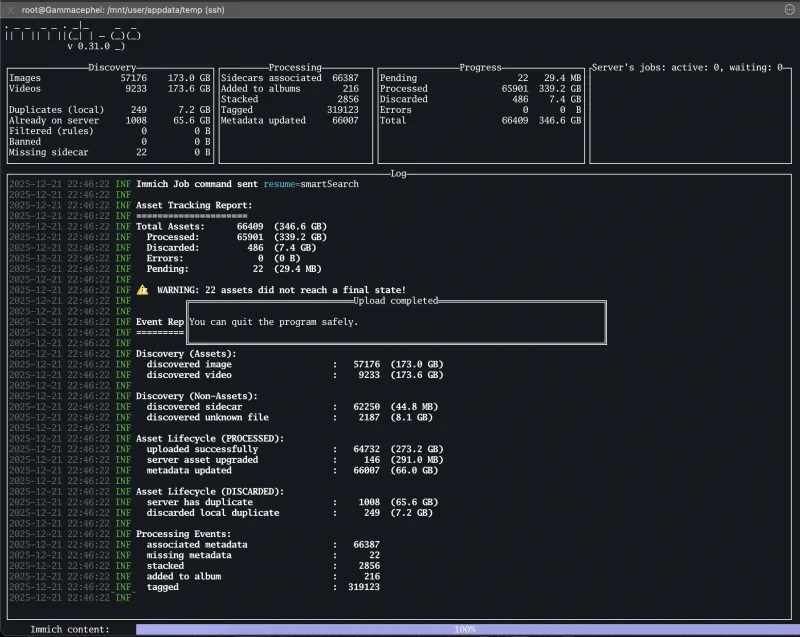 Immich-Go export completed successfully with almost all files imported.
Auto Backups
The mobile apps support auto backups over WiFi and cellular. I enabled both on my phone and my wife’s to ensure our photos and videos are always backed up to Immich. The apps also support selective backups, so we can choose which albums or folders to back up. This is particularly useful so that we can back up our camera rolls and Snapchat photos, but not app screenshots or downloads.
I also configured the UNAS to back up the Immich directory once a week to Backblaze B2 using its built-in backup features. This way, we have an offsite backup of our entire photo library in case of any disasters. Down the road, I plan to host a second UNAS at my parents’ house as another backup target, giving us a nearby offsite backup for quicker restores.
Conclusion
In summary, migrating to Immich has been an easy experience. The platform checks all the boxes for self-hosted photo management, and the transition from Google Photos was smooth thanks to Immich-Go. With everything now running on my Unraid server and UNAS for storage, and once my Wife’s library is migrated, I will have full control over our family’s memories. No more worrying about rising cloud storage costs or privacy concerns.
If you’re looking for a self-hosted photo solution, I highly recommend giving Immich a try!
If you like the post please consider sharing it! Also, if you like the blog consider supporting me via the links on the About page. I don’t run ads so every bit helps keep the lights on!